- VMware Technology Network
- :
- Desktop Hypervisor
- :
- VMware Workstation
- :
- VMware Workstation Pro Discussions
- :
- SYSTEM THREAD EXCEPTION NOT HANDLED
- Subscribe to RSS Feed
- Mark Topic as New
- Mark Topic as Read
- Float this Topic for Current User
- Bookmark
- Subscribe
- Mute
- Printer Friendly Page
- Mark as New
- Bookmark
- Subscribe
- Mute
- Subscribe to RSS Feed
- Permalink
- Report Inappropriate Content
SYSTEM THREAD EXCEPTION NOT HANDLED
Recently upgraded my PC to a new Dell XPS 17 with Windows 11. I upgraded my VMWare WS Pro to version 16.2.4 (supposedly Windows 11 Compatible per KB 80807). Previously I had multiple W10 VM's running on a Windows 10 host (VMWare version 15.2.??). I've ran those VM's on the new host, both as the original, and after converting to WSPro V16.2.4. On almost every launch of these VM's I get the BSOD with the message "SYSTEM THREAD EXCEPTION NOT HANDLED". The VM will go through a few rounds of auto restarting and repair, and eventually they manage to get up and running, but never really indicate exactly what went wrong. I've run SFC /Scannow, and a few other utilities, which occasionally find small things, but still have problems starting these VM's even after these utilities. Google research indicates that this error is typically a driver issue, often the graphics driver, but there isn't a way to change the graphics driver within the VM's.
Any help/direction would be greatly appreciated!
P.S. I've disabled side channel mitigations on all of these machines

- Mark as New
- Bookmark
- Subscribe
- Mute
- Subscribe to RSS Feed
- Permalink
- Report Inappropriate Content
Hello,
Bumping up this topic. I have a very similar issue - DELL XPS 17, W11, WS PRO 16.2.4 build-20089737.
It was all working fine, and in recent days (since 5.11) I have problems - started with low performance and now also the SYSTEM THREAD EXCEPTION NOT HANDLED started to show up at boot time.
Looking forward for any help.
--best rgds
Marcin
- Mark as New
- Bookmark
- Subscribe
- Mute
- Subscribe to RSS Feed
- Permalink
- Report Inappropriate Content
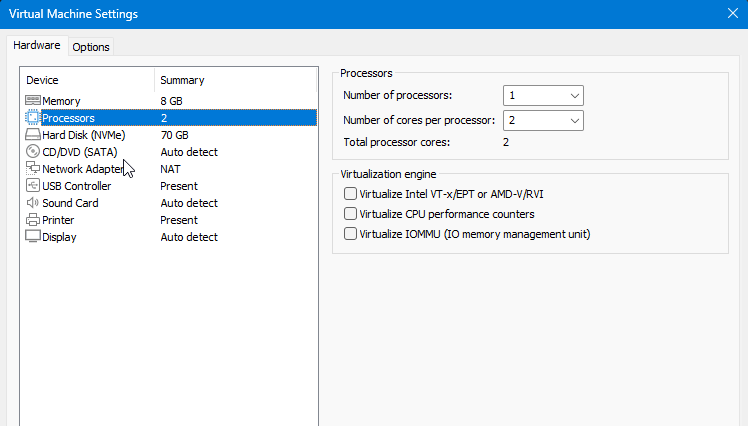
I spent about 3hrs. on the phone this morning with VMWare Tech Support. We didn't necessarily solve the issue, but found a workaround, for the time being. We reduced the processor count to 1, and the core count to 2 on each machine and these problems seem to have gone away. Would obviously prefer to have more processors available at the guest, but it does seem to be working. Tech Support indicated that they would research the issue, and get back to me if a better solution was available. I will update this post if they find a better solution.
P.S. There are plenty of cores available on the Host Machine (14)
- Mark as New
- Bookmark
- Subscribe
- Mute
- Subscribe to RSS Feed
- Permalink
- Report Inappropriate Content
I'm having the same problem, on two vastly different host machines. This is a problem for Windows 10 or 11, 32 or 64 bit, totally default VM setup. Dropping things to one CPU has not worked for me, so I'm resorting to disabling Windows Update, which is not an option for the vast majority of use cases. I hope there's a solution to this soon.
- Mark as New
- Bookmark
- Subscribe
- Mute
- Subscribe to RSS Feed
- Permalink
- Report Inappropriate Content
Hi. I have just updated the BIOS on my XPS 9720 from 1.10.0 to 1.12.0. The problem did not occur again.
- Mark as New
- Bookmark
- Subscribe
- Mute
- Subscribe to RSS Feed
- Permalink
- Report Inappropriate Content
I tried the BIOS upgrade (1.11.0 to 1.12.0), unfortunately it didn't seem to help with my issue 😞 . Same machine Dell XPS 17 9720
- Mark as New
- Bookmark
- Subscribe
- Mute
- Subscribe to RSS Feed
- Permalink
- Report Inappropriate Content
There is a whole range of problems with the new Intel CPUs with P & E cores (that includes our lovely XPS 9720 as well). Please read more in this thread: Poor support for Intel 12th gen processors - VMware Technology Network VMTN, no clear resolution there, and observation that VMs work faster and with fewer issues on older CPUs. My best guess is that before VMware takes action on better support of the new Intel CPU, we're stuck. I was so fed up with my VM that I removed it all the way and resorted (luckily, I could) to working without virtualization for the time being.
- Mark as New
- Bookmark
- Subscribe
- Mute
- Subscribe to RSS Feed
- Permalink
- Report Inappropriate Content
I am running a windows 10 VM on Windows 11 host machine with VMware workstation 16.2.4 build-20089737 and AMD Ryzen Threadripper 2990WX 32-Core Processor, 3000 Mhz, 32 Core(s), 64 Logical Processor(s). The issue still exists and as soon as you increase the number of processors or cores from the default 1x2 combination I get this error. Thinking of doing Vmware 17 upgrade but have not found anything that would suggest it would fix this issue . I have had this issue for over a year and nothing has worked so far.
- Mark as New
- Bookmark
- Subscribe
- Mute
- Subscribe to RSS Feed
- Permalink
- Report Inappropriate Content
I just upgraded to VMWare 17, it did not fix the issue.
- Mark as New
- Bookmark
- Subscribe
- Mute
- Subscribe to RSS Feed
- Permalink
- Report Inappropriate Content
Win 11 host, VMWare Workstation 17, Win 10 VMs, latest VMWare Tools, latest hardware compatibility, processors/cores reduced to 1/1 - all to no avail.
Now, having simply downgraded the hardware of the VMs to v15, running with 2 processors x 2 cores each, both have been stable for some time and through a couple of Windows Update cycles, so I am cautiously optimistic...
CANCEL: Both Win 10s went back to their blue screen on reboot after installing Feature Update to Windows 10, version 22H2
- Mark as New
- Bookmark
- Subscribe
- Mute
- Subscribe to RSS Feed
- Permalink
- Report Inappropriate Content
Try to add parameter hpet0.present = "TRUE" into .vmx file as was written here.
https://communities.vmware.com/t5/VMware-Workstation-Pro/Windows-10-2004-May-2020-Update-VM-upgrade-...
it helped to me.
- Mark as New
- Bookmark
- Subscribe
- Mute
- Subscribe to RSS Feed
- Permalink
- Report Inappropriate Content
I have this problem to on a new Dell XPS 17 9720 running Windows 11. I had to change my CPU setting from ( # Processors 2, # Cores per processor 4) to ( # Processors 2, # Cores per processor 8). That seemed to get around this issue.
BTW: This is Workstation Pro 17.0
However, it does NOT fix the freezing and poor performance that others are experiencing on windows 11 machines.
I did not have these issue(s) running the same VM(s) on an older Dell AlienWare machine (Windows 10).
I have been running vmware for many years and never had these type(s) of issue(s).
VMWare, please escalate these issue(s) and get us a fix!
- Mark as New
- Bookmark
- Subscribe
- Mute
- Subscribe to RSS Feed
- Permalink
- Report Inappropriate Content
linux sort of works - very slow and 3d graphics support seems to be buggy. Not sure if these issue(s) are interrelated to the underlying cause(s) of the above issue. (See other threads about problems with workstation on windows 11 host) - there are plenty of them!
- Mark as New
- Bookmark
- Subscribe
- Mute
- Subscribe to RSS Feed
- Permalink
- Report Inappropriate Content
We are having the same problem on HP ZBook G4 machines. Any idea what we could try?
- Mark as New
- Bookmark
- Subscribe
- Mute
- Subscribe to RSS Feed
- Permalink
- Report Inappropriate Content
- Mark as New
- Bookmark
- Subscribe
- Mute
- Subscribe to RSS Feed
- Permalink
- Report Inappropriate Content
Dell XPS 17 9720
Processor 12th Gen Intel(R) Core(TM) i9-12900HK, 2500 Mhz, 14 Core(s), 20 Logical Processor(s)
OS Name Microsoft Windows 11 Pro
Version 10.0.22621 Build 22621
Current configuration, Version/build level has most likely changed from when this was originally posted in October.
- Mark as New
- Bookmark
- Subscribe
- Mute
- Subscribe to RSS Feed
- Permalink
- Report Inappropriate Content
Hello, the problem is the NVME which is incompatible for the moment only those win 10 32 bits. The problem can be solved by switching from NVME to SCSI without losing data with this procedure:
1. Open VMware
2. Select Windows 10 32-bit
3. Click on Edit virtual machine settings and then select Hard Disk
4. Click remove and then click Add...
5. Select Hard Disk then click Next
6. Select not NVMe but SCSI then click Next
7. Select Use an existing virtual disk then click Next
8. In the empty field select Browse... and navigate to the folder where the virtual operating system is saved then click Finish
9. A small window will come up that you need to click Keep Existing Format and then click OK
10. Let's see the Hard Disk (SCSI) result then start the virtual machine
NOTE: In some cases at the first boot you see the BSOD (it's normal it happened to me too) but after the restart it starts normally
- Mark as New
- Bookmark
- Subscribe
- Mute
- Subscribe to RSS Feed
- Permalink
- Report Inappropriate Content
Hello @Mat92,
I've check on my side and we are already on SCSI.
We have also tried running on Workstation Pro 16 and Workstation Pro 17
Both are crashing VMs
Running on i7-7700HQ CPU @ 2.80GHz
Thanks!
Alec
- Mark as New
- Bookmark
- Subscribe
- Mute
- Subscribe to RSS Feed
- Permalink
- Report Inappropriate Content
I have the same problem Windows 11 host on Dell Precision 7780 13th Gen Intel(R) Core(TM) i9-13950HX 2.20 GHz.
VMs are not really usable on this machine.
- Mark as New
- Bookmark
- Subscribe
- Mute
- Subscribe to RSS Feed
- Permalink
- Report Inappropriate Content
Same with Precision 7770 i9 12th Gen Intel(R) Core(TM) i9-12950HX 2.30 GHz
Killer!